What I need to know about natural fermentation process
It is one of the oldest, healthiest and most reliable ways of storing food without the use of artificial chemistry. Cabbage, due to its natural flora, is a great healthy vegetable with a long shelf life due tho the fermentation. After you finely shred it, its sugar containing juice will ferment and microorganisms on surface of its leaves will produce lactic acid (1.5% to 2%) which preserves it from food-borne illnesses and rotting. Lacto-fermentation process takes time; depending on how finely leaves are shredded and at what temperature it is stored, it can take from 3 weeks to few months. This is why a hand slicing with good quality cabbage shredder is better than machine slicing; finely shredded leaves give off more juice and juice is what gets all those healthy microorganisms and fermentation going. Adding salts helps draw juice out of kraut, but it also helps balancing healthy bacteria, favoring them and stopping undesirable ones from multiplying.What do I need to make homemade sauerkraut?
Since making sauerkraut is ancient skill, it needs only the basics: cabbage, salt, cabbage shredder, sharp knife, big bowl and storage containers. It’s as simple as that!- Cabbage. Various types contain different amounts of sugar, but generally best fermentation results are achieved with large solid heads of white cabbage. You can use all kinds of cabbage-heads and still get great sauerkraut, but the larger the head (especially if it’s been picked in late autumn) - the higher percentage of sugar it contains and faster the fermentation. It is best to use organically grown vegetable.
- Salt. Choose natural non iodized salt. Non-iodized salt will not slow down bacterial fermentation plus it’s full of minerals. Since you will later drink and use fermented kraut’s juice (which is very healthy source of vitamins and healthy gut bacteria) – it’s best to use a good quality salt, for example Himalayan Pink Salt or any other mineral-rich, natural non-iodized salt. On average, you will need 2-2.5% of salt by weight.
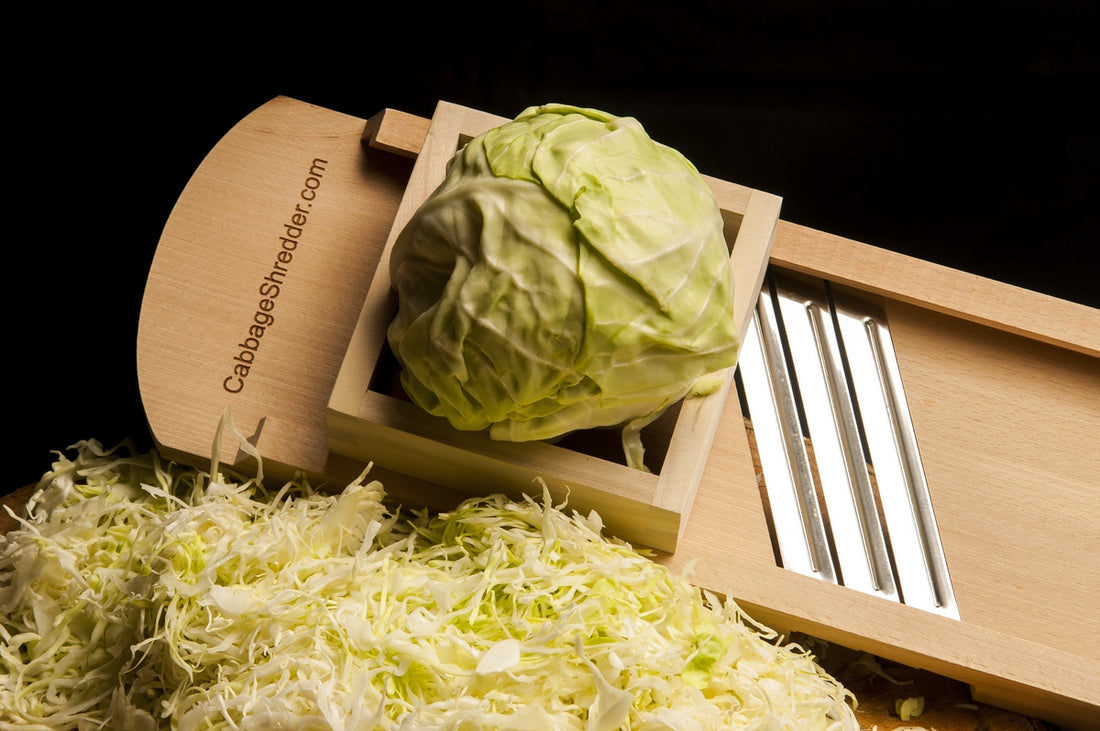
- Cabbage shredder. It’s important that shredder’s blades are sharp and adjusted for fine shredding. Having high quality cabbage shredder will make the experience of making homemade sauerkraut fast, easy and enjoyable since process of shredding is basically the only “work” you will have to do to make this delicious, beneficial and healthy food.
- Large bowl. You will need it to slice cabbage into it without making a mess you must clean up later.
- Storage containers. You can use earthenware crocks, food-grade plastic containers or glass containers. Make sure your storage containers are not damaged or chipped and don’t use ones made from metal. Well balanced and successful natural fermentation needs mass, so if you opt for glass jars choose the largest you can get, rather than the small ones.
OK, all is prepared. So now, how do I make sauerkraut?
Cleaning it. Remove and cut off outer leaves and any rotting spots or damages. You will only lightly rinse the cleaned cabbage heads because fermentation process will not happen without bacteria on leaves’ surface (this is why you should use organic vegetables). Leave it to drain well.
Slicing it. Cut kraut heads in quarters and use cabbage shredder to shred them into a large bowl. Good cabbage shredder will save you time and nerves, but it will also make fermentation process faster and more balanced because shreds will be as thin and long as possible (more juice and better fermenting). Throw away the cabbage’s core.
Weighing it. On average, you will need 3 tablespoons of salt per 5 (2,3 kg) pounds of sliced cabbage.
Salting it. In a big bowl, place a layer of cabbage and then sprinkle salt over it. Repeat until you spend all cabbage and salt.
Leaving it over night. Take a clean damped kitchen towel and place it over bowl with salted shreds. It’s best to leave it on a cold clean place over night so that salt can bring out all the juice from cabbage.
Packing it firmly into storage containers. After it’s been left overnight, mix it very well with your hands. Take clean storage containers and start packing them firmly (you can use your fist) layer by layer with cabbage; the goal is to press it hard so that enough juice is drawn to cover cabbage completely. If cabbage is not juicy enough, poor some slightly salted water over but it is of absolute importance that shreds are completely covered with liquid! Lacto-fermentation is anaerobic process – it takes place without oxygen and anything not submerged into liquid will start to smell, mold and rot. Don’t overfill the containers; kraut needs to be constantly covered with liquid and once it starts bubbling (fermenting) it might overflow from container.
Leave it to ferment. Shreds should constantly be pressed in liquid, so feel free to use some plates, weight (bottles filled with water, natural disinfected stone etc.) or special plastic cross-hairs (for glass jars) to keep it from floating up. Storage containers should be lightly, not hermetically closed. Leave them to ferment on a well ventilated place at room temperature (15 degrees Celsius/60-70 degrees Farad) and periodically add slightly salted water if necessary. During first few days, cabbage will bubble and rise upwards. There may be a film of mold forming on a surface – it’s perfectly normal but skin that off and throw it away. After few weeks bubbling will stop and settle – your sauerkraut has fermented and is ready to eat!
After your homemade sauerkraut has fermented, you should store it on a colder place, garage, basement or if in smaller amounts - in a fridge. Congratulations! You have made your own organic, natural and tasty food with all vitamins, minerals and probiotic microorganisms using zero harmful chemicals! For more detailed instructions that goes beyond the basics please check our revised post: how to make sauerkraut video and recipe guide for beginners.